Wednesday, April 24, 2013

Molecular Gastronomy in the Industry

I figured after all of this home oriented cooking, my readership (good word) might appreciate learning about some of the few restaurants in the world that specialize in molecular gastronomy!

First a bit about how restaurants are rated in the professional realm. There are two majorly significant rankings that are relatively well known: the michelin star system as well as the annual World's 50 Best Restaurants ranking. Michelin stars are probably one of the most highly coveted awards a restaurant can get, with three Michelin stars being the highest one restaurant can receive. In 2012, only 106 restaurants in the world received a three Michelin star designation.

The Celler de Can Roca is a Spanish restaurant owned by three brothers who are the chef, manager, and sommelier. The Celler opened in 1983 near the bar of their parents and since that year, the Cellar has grown into a giant restaurant with three Michelin stars. The original purpose of El Celler was to create a restaurant's research, and has been at the front of the molecular gastronomy movement. The brothers have experimented with things like the olfactory sensations and gases with flavors to create a unique experience. In 2012, El Celler de Can Roca was named the second best restaurant in the world. Using techniques like blowing sugar to create peach like spheres, they are at the forefront of the gastronomic world.
This is not a peach. It is sugar blown like glass to create a unique shape that mimics a peach or nectarine

Another restaurant in Spain called Arzak has been rising in the culinary world. Arzak recently was named the 8th best restaurant in the world, and aims to transform traditional basque food from the northern region of Spain using molecular gastronomy. An example below is their soft boiled egg with gelatin caviar:
The white is an egg that was cooked sous vide so that the white of the egg firms up while the yolk is liquid
The broken egg white

These are only a few of the many amazing examples of molecular gastronomy in the culinary industry! Not quite for the home chef, but still fun to look at!

Monday, April 22, 2013

Carnivorous Gastronomy

For the meat dinner, I actually kept some of the courses the same for the sake of simplicity for myself. The first course was the same Caramelized Carrot Soup and Garlic Knots as the vegetarian night, and the second course was an entire serving of the Daikon Paad Thai. After that, however, it deviated a bit.

The main meat course consisted of a culinary pun for those foodies out there.

72 Hour Short Rib "Filet" 
with Potato "Gnocchi"

A very traditional dish is to serve beef short rib (a very lean, cheap cut) served with gnocchi to soak up the sauce of the short rib.

Another traditional dish is to serve filet steak with mashed potatoes.

So, to have a bit of a play on tradition, I used the sous vide machine on the short ribs for 72 hours to break down the collagen in the meat, giving it a super tender and smooth texture, almost like that of a filet. Then, I used mashed potatoes to form little gnocchi-like balls. So while the first look at the dish may have appeared to be traditional short ribs and gnocchi, it tasted more like a filet and mashes potatoes. To finish off this dish, I made a horseradish cream sauce with fresh horseradish root to give it just a little bit of kick at the end.

For the dessert, I amplified my original dessert from the first dinner. Instead of a pure guava geleé, I used a guava reduction and then topped it with an orange juice reduction geleé. Because of agar's heat resistant properties, the two gels formed perfectly distinct layers on top of each other, giving a unique colorful presentation. In addition, I did the caramelized bananas again and gave my guests the opportunity to try caramelizing their own bananas!

It was a great amount of work and a great amount of fun! I hope that everyone present enjoyed themselves greatly! 

Feel free to give me any questions you might have!

Sunday, April 21, 2013

Vegetarian Gastronomy

I am pleased to announce that after this past Thursday, I have finally completed both of my Teacher Dinners for my project! It was great fun and I really enjoyed putting it on, thank you to everyone who participated!

For this blog post, I'm going to tell you about the vegetarian night menu and how it used molecular gastronomy.

Edible Chemistry: Vegetarian Night

Caramelized Carrot Soup
with Garlic Knots

"Grilled" Romaine
with Emulsified Balsamic Dressing

Three Pepper Platter
with Refried Beans, Daikon Paad Thai
and Sous Vide Vegetables

Tropical Molecular Gastronomy
with Guava Geleé, Caramelized Banana
and Mango Smoothie

Caramelized Carrot Soup with Garlic Knots

This course was meant to show how a traditional ingredient such as carrot can be used in ways other than what is expected. The carrots were pressure cooked in butter and pureed, then added to some fresh carrot juice. All that was in the soup was carrots and butter. Simplicity can often produce amazing results. The Garlic Knots were served with olive oil powder, made from tapioca maltodextrin, because frankly its just cool.

"Grilled" Romaine with Emulsified Balsamic Dressing


Grilled Romaine is actually a thing! (Sorta). Instead of grilling it though, I used molecular gastronomy. Which means: TORCH. The smokey flavor coupled with the lettuce produces a unusual but delicious flavor and aroma. The very stereotypical sweet balsamic dressing on the lettuce sharply contrasts with the uniqueness of the torching of the lettuce.

Three Pepper Platter with Refried Beans, Daikon Paad Thai and Sous Vide Vegetables

I served all three of these small dishes in hollowed out bell peppers. Cause then you can eat the serving vessels as well! The refried beans were made in total of one hour in a pressure cooker (which is amazing considering most recipe involve soaking the beans for 24+ hours). The Paad Thai had a traditional sauce, but instead of rice noodles I used strips of daikon radish. And the sous vide vegetables were to exemplify the power of sous vide cooking using only fresh vegetables and olive oil.

Tropical Molecular Gastronomy with Guava Geleé, Caramelized Banana and Mango Smoothie

The dessert was meant to be almost like a lighter palette cleanser to end the meal. The guava geleé was simply guava nectar with agar to form a brittle gel, which has a very smooth mouthfeel. The banana was sugar on half a banana that was then torched to form an almost creme brulée style crust on top, and the mango smoothie for just a little extra sweetness at the end.


So there you have it. It was fantastic, and because it was first I was able to improve some of these dishes for the second dinner! Let me know if you have any questions below!

Friday, April 12, 2013

This is cool, but I could never do it....

That is what a lot of people seem to say about molecular gastronomy. As my project slowly winds to a close, I will focus more closely on how molecular gastronomy applies to the home cook, particularly the three main points of my thesis: financial feasibility, understanding of scientific concepts, and difficulty of culinary technique.

Let's begin with financial feasibility. One of the most commonly perceived barriers to using molecular gastronomy at home is the price tag that comes with some of the equipment. I admit, the home centrifuge, pacojet, and rotostator homogenizer are a bit of a stretch at thousands of dollars each, the basics are not beyond the average kitchen.

As cited in my last post, a small home sous vide machine with a vacuum sealer is priced between $400-$500, which while not inexpensive, is comparable to some standing mixers and blenders on the market today. I find far more use for a sous vide machine compared to a standing mixer, but most home chefs don't understand how to use them or why they're worth the cost, which relates to the understanding of scientific concepts.

In one of my first posts, I discussed many of the unique different ingredients used by gastronomists and where to obtain them. For those who haven't read it, I encourage you to scroll back and read it. Many of the ingredients, whether it be soy lecithin or sodium alginate, often cost as little as $10 for 50 grams, which may not seem like a lot, but when a recipe calls for only 2 grams, a little goes a long way. "Fancy chemical names" do not imply prohibitive costs.

I'm not saying that molecular gastronomy is going to save you any money; however, I will argue that you can improve your home cuisine without a steep price increase compared to a traditional kitchen as many would expect.

I had my first Molecular Gastronomy Dinner on Wednesday and it was a fantastic success! Thank you all who attended! I will post more on both of my dinners after the second one occurs this upcoming Thursday.

Saturday, April 6, 2013

Sous-What?

Home sous vide model
If you've been reading carefully, you've probably noticed the phrase "sous vide" popping up quite a bit. But what is it? Sous vide is a cooking technique in which whatever you want to cook is placed in a food-grade plastic bag and vacuum sealed inside with whatever sort of sauce or seasoning you wish. The vacuum sealed bag is then placed in a temperature controlled bath for a long period of time to cook. Let's say you want your steak to have an internal temperature of 140 degrees F. Cook the steak in a sous vide at exactly 140 and a few hours later you have perfectly cooked steak all the way through! Because a sous vide cooks the meat or vegetables at whatever temperature you desire them to be served at, it is impossible to burn or overcook it.


Professional Immersion Circulator Bath (used for sous vide)


Heston Blumenthal (one of the fathers of molecular gastronomy) said that "sous vide cooking is the single greatest advancement of cooking technology in decades."And he was right. But sous vide is becoming more and more applicable to the home chef. the line of SousVide Supreme home sous vide machines  are greatly reduced in price from traditional immersion circulators like the one shown to the right. This means that home chefs can cook meat to the perfect temperature every time, just as more and more restaurants are doing today. Ever go to a restaurant and wonder how they manage to get their steak or chicken so perfectly done all the way through and remain juicy? It's usually a sous vide coupled with a minute of searing on the grill at the end. The key is that because water is used to transfer heat rather than air, completely submerging the food in the water bath means that every part of the surface of the meat is cooked at the same temperature--no hot spots like a grill may have. While the price of a sous vide still is not exactly inexpensive, the prices continue to drop due to more and more consumer demand. I use my sous vide for many experiments and it is worth every penny! Check out Sous Vide Supreme's website and Costco.com for more info!

Friday, March 29, 2013

Not-Lemon Curd

Since there was a rather underwhelming lack of response to my last post, I asked myself this question: what do I want to cook? After a brief exploration into some of my recipes, I decided to make lemon curd. Lemon curd is a jam-like spread that is usually used on pastries in place of jelly. It's often characterized by its sweet and tangy flavor profiles.

But of course a modernist chef doesn't want to make traditional lemon curd, but how can you make a delicious spread all science-y? Well the molecular gastronomy chef tells us that we should either put something new in, or take something essential out.

So I made lemon curd without lemons.

No zest, no juice, and no lemons were harmed in the making of this curd.

So how did I do it? Well, I used a relatively traditional recipe but used an ingredient that provides the same flavor as lemon. What is it you ask? Well this is molecular gastronomy, of course its a small white crystalline powder with a chemical name! In this case, I used Citric Acid.

Citric acid is the compound that gives all citrus its tangy flavor. Except this stuff is highly concentrated. I only used about 4 grams to go with more than 10x that amount of egg yolks. The citric acid is dissolved in a sugar syrup and combined with cooked egg yolks (sous vide of course) and butter. Whip it all together and refrigerate, and you have Not-Lemon Curd!

 Comment if you want the recipe!

Saturday, March 23, 2013

Blog Posts A La Carte


Since I’ve been so busy working on planning and trying out all the dishes on my menu (which will continue to remain secretly mysterious for now), I want to give an opportunity for people to ask specific questions about molecular gastronomy and cooking in general!

There are so many different topics that I do not have a chance to cover but a fraction of them in this blog! So, you, as my readers, have the opportunity to choose what my next blog post will be on!

Just leave a comment below and I will spend a portion of next week researching your question and do my best to answer it. Think outside the box! You can ask questions on how appliances work, or about why different techniques yield different results in cooking, or why that last recipe that you FOLLOWED PERFECTLY didn’t turn out so well.

I expect the blogosphere to be abuzz with a different culinary query every minute! Don’t hesitate! Don’t be shy! This is how molecular gastronomy can be applied into our home kitchens! First we have to ask the simple question of our delicious meals: why does this work? Or, perhaps more importantly: why didn’t this work?

Science is about asking a question and trying to answer it through experimentation. Cooking is the same way. I have mushrooms, onions, eggs and milk in my fridge; what can I make with that? (If you were thinking quiche or frittata, bravo).

I can deal with things many consider hard to swallow (pun intended), so give me your hypotheses and questions! 

Wednesday, March 20, 2013

Fizzy Fruit

Hello again! After a relaxing week off, I am back with more food than before! I am well into designing the menu for my dinners that will be the final product of my presentation, and will be continuing to perfect those recipes as time goes on. But for now, I have a very fun and simple experiment that most people can do at home!

Ever had sparkling cider? Or perhaps a different fruit flavored soda? We like the sweetness of the fruit combined with the carbonation of the liquid. What if we could do that...but inside the fruit?

Carbonation is the process of putting Carbon Dioxide bubbles into a liquid under pressure. When the pressure is released, the Carbon Dioxide leaves the liquid over time in the form of small bubbles, which we perceive as fizziness. That's why we can have drinks like sodas stay carbonated for long periods of time when they're unopened; they're still under pressure.

But back to the fruit. It's pretty obvious that most kinds of fruit are full of juice. We often drink it from a concentrated form with breakfast. But how could we carbonate the juice inside of an orange? The pretty simple answer involves using a form of Carbon Dioxide that most people are familiar with: dry ice.

Dry ice is a relatively easily obtained ingredient and is available at many regular grocery stores if you just ask the cashier when you check out. At only a few dollars a pound, it is also very reasonably priced. But how does one go about actually carbonating fruit with a chunk of dry ice?


Here's a step by step process that I've come up with:

1. Cut whatever fruit you wish to carbonate into pieces so that the flesh is exposed. The gas can only penetrate the skin of some fruits. The peel and pith of an orange is too think for example. Grapes do not need any preparation. Experiment with different types of fruit!

2. Get a small ice chest and put a block of dry ice in the bottom (you really don't need more than a pound or two). Fill the ice chest with water so that the dry ice is about covered to ensure that it sublimates correctly. IMPORTANT If you don't put enough water in the bottom, the "fog" that is characteristic of dry ice will not be produced, and the fruit will not carbonate.

3. Put the tray of fruit into the ice chest so that it is above the water level. (Use a bowl turned upside down or something that will make sure that the fruit doesn't fall in the water. Nobody likes soggy fruit. Ew.)

4. With the water and the fruit in the ice chest, close the lid but do not latch the ice chest closed.

5. For an hour check the chest periodically and make sure the lid is closed, if it pops open, just close it again. This is just a way of allowing excess pressure to vent.

6. An hour later, pull out your fruit and enjoy some very exotic fizziness to your fruit immediately!

What happens in the ice chest during that hour is that as the dry ice sublimates (turns from a solid into a gas) the pressure inside builds, forcing carbon dioxide into the fruit. Think of this like an unopened soda can. When you take the fruit out of the ice chest, it's like opening the can of soda. The difference in pressure means that the Carbon Dioxide bubbles in the fruit are being pulled out by the pressure differential. For this reason, eating the fruit right after you take it out of the ice chest is the best way to ensure maximum carbonation. Just like any fizzy drink, the fruit will go flat after a few minutes of sitting out.

This is a very easy and fun thing to do! Give it a try and let me know in the comments how it goes! Don't hesitate with any questions!

Thursday, March 7, 2013

Open Flames and Alcohol...What Could Go Wrong?

Yesterday, I decided to try making bananas foster. For those who don't know, bananas foster is a dish where a sauce is made from butter and brown sugar, bananas are added, then after adding a bit of rum, you light the entire pan on fire.

It's all very good fun.

Lighting things on fire in cooking has a fancy french term (like most other things in cooking) called flambé. In the case of bananas foster, lighting the dish on fire allows two things to occur: caramelization of the bananas, and the burning off of the alcohol in the rum. Unfortunately, as I did my cooking, none of my pictures particularly turned out any good results, as the flame was nearly impossible to see in the sunlight since I was cooking outside (to ensure I didn't destroy anything). But this is a picture I found that gives you the general idea:


The flambé-ing in bananas foster is a way of reducing the liquid in the pan. When using a flame to burn off the alcohol, the water based components of the liquid are left behind. A more traditional form of reduction is simmering a sauce or soup on the stove. So after a few minutes of reducing something on the stove, it usually becomes thicker and the flavors are accentuated because water no longer dilutes it. Reducing on the stove liquids containing alcohol, usually wine or brandy or something of a lower concentration than rum, also gets rid of much of the alcohol. A normal bottle of wine usually contains somewhere between 10-15% alcohol, which is not very much by volume. The boiling point of alcohol is around 173 degrees Fahrenheit, which is more than 30 degrees below that of water at 212. So when cooking down a sauce, the alcohol is actually the first ingredient to begin to vaporize. Flavors become more concentrated when reducing because when the water and the alcohol are both removed, only a little of the original liquid is left, and it has much more concentrated flavor.

By comparison, dark rum like that used in bananas foster contains about 40% alcohol. Why not just use traditional reduction techniques? The first is that because it has such a high alcohol content, flambé is a much more efficient way of reducing the liquid without losing a lot of the water that is necessary to make the sauce for the bananas. The second is that the flame helps to caramelize the sugar on the bananas and really seal in the flavor. Perhaps the third reason is that frankly, who doesn't like to set things on fire?

For those of you who are still curious about the dish in the last post, it was green beans, gnocchi, and fried chicken hearts. If there is one rule I have about food, it is that I will try almost anything once. It's not about what something is, it's about how it tastes. And its amazing what can taste a lot better than you would think. Thanks for reading! As usual, please feel free to comment with any questions!


Friday, March 1, 2013

A Word on Improvisation

Anyone who is a frequent home chef knows that often meals are more based on what's available in the refrigerator than following some recipe. So how can molecular gastronomy play a role in this sort of offhand, improvised cooking? The idea of molecular gastronomy is based on two smaller ideas: using science to improve food, and creating dishes that are innovative and new. Most of this project thus far has focused on the science aspect, but the innovation is probably the more important of the two. The science behind molecular gastronomy cannot function without the ingenuity and creativity behind it. Making some sort of vegetable gel is all well and good, but nobody really wants to have a block of gel as their dinner. The way that science and art come together is best presented in the experimentation of cooking. When we try to create new dishes, we are looking for compatible flavors and textures that are pleasing to the palette, but we also need to ensure that our idea is feasibly executable, and we cannot do that without an understanding of the science behind our food. So, go try something new. Often, molecular gastronomy is simply taking a classic dish and turning each of the elements into something new. Have you ever thought of trying a mexican hot sauce on a chinese dish that needs a little spice? Or, what if you used a dijon mustard foam on top of lamb chops, rather than a traditional sauce? The possibilities are as limitless as the human imagination, and all we have to do is try something new. Not all experiments are delicious successes, but I do believe that you'll be surprised at how often your cooking instict is right.

Since I did not have an actual experiment to go with this post, instead, I have a challenge. Below is a picture of a dish I had on a recent visit to one of my favorite restaurants, Posh. Try and guess what is on this plate! (Hint: Think outside the box). I'll let you know in the next post what it actually is!
Good luck!

A Spectacular Dish

Wednesday, February 27, 2013

Microwave Magic


What is just about the one kitchen gadget that most households have? If you read the title of the post and guessed microwaves, then you're right!  But, do you actually know how your microwave works? Or is it just a magic box you put cold stuff in and hot stuff comes out? Let's talk a little big about how microwaves work.

Photo owned by Modernist Cuisine. (You didn't think I had a machine shop to make this, did you?)

The photo above shows a microwave that has been cut in half. On the left we have the chamber where you put your food. On the right is a device called a magnetron. (Tell all your friends you have a magnetron and watch them be afraid!) The magnetron uses a transformer to create microwaves, which are a type of electromagnetic radiation. As shown by the white arrows above, the waves propagate (fancy word for move) into the path of a fan, which disperses the waves throughout the chamber and thus heat your food by irradiating the molecules. The word "radiation" generally scares people a bit, so let me be clear: MICROWAVING YOUR FOOD WILL NOT MAKE IT RADIOACTIVE. Well, not any more than it already is. But that is for an advanced physics course to explain. The second thing that is concerning about radiation is that being exposed to it can cause cancer and other health problems. Microwaves are a type of radiation; however, they are contained in the microwave (the cooking device) in a very interesting way.

The most common type of radiation that people generally think of being concerned about is called gamma radiation. Gamma radiation is a very small wave that is so fast that it can pass right through solid objects and scramble their atoms, thus causing the health problems. Microwaves are much, much bigger than gamma waves, and thus can be contained. Gamma waves are about 10^-12 meters long. Microwaves are a few centimeters long. So containing microwaves is relatively simple. The screen door on the front of microwaves are usually plastic with some sort of grating on the front. We don't have to worry about being irradiated because the holes in the front of the microwave are so small that the waves inside are too small to get out! How cool is that? The holes are big enough that we can see through them and watch our food, but small enough that it protects us from the harmful radiation within.

This is a lot of complicated physics, so I did a little experiment that you can do yourself to show how big microwaves are. *Please note that the idea for this belongs to Modernist Cuisine and I have simply repurposed it for the use of showing a concept. All of the pictures are my own.*

First, I cut 10 cubes of cheese out of a block of sharp cheddar (good stuff) and made each subsequent block smaller than the first. I ranged the cubes from about 1in^3 to REALLY REALLY TINY.
On the right we see the REALLY REALLY TINY cube.
Below you see that I arranged them on a plate in a circular fashion so that as the base of the microwave rotates, all of the cheese is affected evenly.
Awww aren't they so....cube! (It's a pun on cute, just FYI).
Then, I put the plate with the cubes in the microwave for 10 seconds. And here's what I found:
Wait....what?
The three largest cubes melted the most, while the small cubes...did nothing. For posterity's sake, I put the plate in for another 10 seconds:


Here are the five smallest cubes...apparently unmelted. They were also quite cool to the touch. But what happened to the big ones?
Here we have....some large puddles of melted cheese. A quick thermometer test said that the melted cheese had reached a temperature of 114 degrees fahrenheit, while the little cubes were room temperature.

So what the heck happened?! The average home cook would shrug their shoulders and eat their melted cheese happily. But us molecular gastronomists demand answers! The answer is in the physics. The microwaves, as we said before, are a few centimeters in length. Half of the cheese cubes were smaller than that, so it is impossible to warm them with microwaves. They're too small to be warmed. If you've ever tried to make chocolate fondue or chocolate dipped strawberries, you usually put chocolate chips in a double boiler. A novice puts a big bowl of chocolate chips in the microwave and it takes FOREVER to warm them. Why? Because each chocolate chip is too small to be affected by the microwaves, so it has to warm the whole bowl rather than each individual chip; it's the same principle. So, the moral of the story is don't put small pieces of food in the microwave--it just won't work.

Liked this post? Let me know in the comments! Any and all questions are welcomed and accepted!

Saturday, February 23, 2013

The Great Plan...

So for this post I'm taking a bit of a break from science and going to explain a bit more about my project. Today, I had a meeting with Joshua Hebert, Chef and Owner of Posh Scottsdale, one of my favorite restaurants. We were discussing the menu for a very large and important upcoming dinner I am having.

As part of my senior research project, I must produce something that will help contribute toward my conclusion of my thesis of whether molecular gastronomy is viable for the home cook--and I don't want people to have to take my word for it. So I decided the best way to test this hypothesis is to experiment on *cough* ask for some volunteers to be tasters at a molecular gastronomy dinner I will produce. There were a large number of teachers and administrators at my school BASIS Scottsdale that were more than happy to oblige.

At this point, I have decided that I will do two separate dinners, one with meat, and one vegetarian. The menus at this point are under consideration and will be released only after both of the meals have been executed. Part of the appeal to molecular gastronomy is the experiential portion, and I want it to remain a surprise for all of the guests, some of whom read this blog.

These two dinners will be reviewed by the guests based on very specific criteria that will measure two things: the dinner itself, though this is also very dependent on my cooking and does not reflect the average chef, as well as preconceived notions about food science, cooking, and how they believe it applies in the kitchen.

Any questions about this or the previous posts? Please let me know below and I'm happy to respond to any comments or suggestions!

Wednesday, February 20, 2013

Under Pressure

Last week, I got a new piece of equipment: a pressure cooker! A pressure cooker uses an ordinary stove and basically acts like a big pot with an airtight lid. Why use a pressure cooker over just an ordinary pot? Pressure cookers can cook things a lot faster than normal methods because of the pressure they build up. At full pressure, most cookers go to about 1 bar, or 15 psi (pounds per square inch). When the pressure in the pot is raised that high, it also increases the boiling point of water from 212 F to about 250F. The difference in temperature accounts for the shorter cooking time. Pressure cookers are also used for canning (which ironically usually uses jars, not cans) at home. I found a recipe for pressure caramelized onions that actually used jars so I decided to try it out as my first pressure cooked recipe.

First, I put onions and baking soda (I still don't know the purpose of the baking soda) into small mason jars with some butter on top of it all. NOTE the caps were screwed on all the way, and then backwards a quarter turn to ensure the jars did not explode. If the caps had been screwed on all the way, the pressure differential between inside and outside the jars could have caused them to rupture.

Ooooo...artsy photography.
Then, I put the jars in the colander-like basket for the pressure cooker, and put about an inch of water in the bottom. I then put them in the pressure cooker for 40 minutes at 1 bar/15psi.

Jars.


Six jars...One pressure cooker....One delicious meal
In this picture you see the jars after cooking. Now, for those who don't know, mason jars that are used at home usually have two parts to their lids, unlike what you would buy at the store. There is a flat piece that goes on top that has the little button that pops after it has been open, and then there is an outer ring that screws on to tighten the flat piece down. (See here). So as I went to unscrew the lids of the jars, all of them came off...except one. Usually pressurized containers have to cool to allow pressure to equalize to the outside in order to open them, but this one was much harder than the others. I let it cool for about half an hour so I could physically pick up the jar, but it still wouldn't budge. Then, I noticed bubbles coming from inside the jar. It was still boiling. Don't believe me? Aha! I have video proof:

Wait, what? The jar was still boiling after half an hour at room temperature...and it was cool enough that I could pick up the jar? After a brief discussion with my physics teacher, we determined that a vacuum must have formed inside the jar, which lowered the boiling point of the water inside the jar. The idea is that as the jar pressurized, the gases expand out of the jar because it is not completely sealed. When the pressure cooker is taken off heat, the gases slowly cool and condense. On this particular jar, it must have happened that the lid was on slightly too tightly so as the pressure increased outside the lid, it created a seal. The cooling of the gases inside the jar caused some of the gas to revert back to liquid or solid in the jar or on the onions (called adsorption [no, thats not a typo]). As these gases became liquid or solid, they were no longer contributing to the overall pressure in the jar. Therefore, an area of negative pressure was created and caused a suction that made the lid nearly impossible to get off. The principle that allows the pressure cooker to be effective also works in reverse. As the pressure inside the jar went down, so too did the boiling point of water. Hence, the remaining water was able to keep boiling at a much lower temperature. After about two hours of cooling, and trying to pry the lid off with a knife, the mixture continued to boil until I used a can opener to create a hole to break the vacuum seal. Pretty cool, huh? I'm not sure how much sense that made, but if you have any questions feel free to comment and let me know! Stay tuned for the next post!


Saturday, February 16, 2013

How to Bake a (Very Small) Cake in 35 Seconds!

Have you ever gotten home from a long day and thought, "I could sure go for some cake right now!" Maybe not. But if you were to think that, you would then remember all the work that goes into it and how long it takes to bake and perhaps forgo the whole debacle. But there is a solution! I can bake a cake in 35 seconds. Well, perhaps bake is a bit of a misnomer. I can microwave a cake in 35 seconds. Why can't we apply the same principles we use in the oven to a microwave? A part of molecular gastronomy is about finding ways to simplify cooking. Take a look at how easy this is! *Please note this recipe comes from Modernist Cuisine, but I have adapted part of it to make it even easier.*

A Personal Snack Cake

1. Get a few paper cups.

2. Make your favorite cake batter, or, alternatively, go buy a box of Betty Crocker Super Moist Cake Mix and follow the instructions to create the batter.

3. This is where I differ from Modernist Cuisine. They use a whipping siphon to make the batter light and fluffy. Which works great; however, after a few of my own bench tests, I discovered that you can produce almost the same results as them WITHOUT the whipping siphon! If you have a whipping siphon, then feel free to try it out! (If you have interest in this tool, I recommend an Isi Whipping Siphon, they're not too expensive).

4. Using scissors, cut about three holes in the bottom of the paper cup. Then, grease the bottom and sides of the cup with a nonstick cooking spray or vegetable oil.

5. Fill the cup no more than 1/3 of the way full with batter. It's thick enough that it won't leak out of the bottom.

6. Doing one cup at a time, put a batter-filled cup in the microwave and heat it on high. Microwaves are notorious for differing in their heating times. Modernist Cuisine recommends 1 minute. My microwave preforms best at 35 seconds. Try out a few different times on your own microwave and see what time gives you the fluffiest cake without losing moisture. The batter in the bottom of the cup will rise a surprising amount.

7. Take the cup out of the microwave and turn it upside down on a plate. Give it a few seconds to rest and allow steam to escape, then tap the cup on the plate to allow the cake to fall out.

8. Serve! You can pick almost any flavor you want. Serve individual warm chocolate cakes with fudge or caramel sauce. Serve lemon or vanilla cakes with fruit or freshly whipped cream (it's much better than out of a can, trust me. Also, another good use for a whipping siphon!) It's incredibly easy to do, I was shocked and amazed at how well it work.

Give this a try! Anyone can do this one, leave me a comment and let me know how it goes!

Wednesday, February 13, 2013

It's Just Mac and Cheese, What Could Go Wrong...

...apparently a lot. I now know for a fact that the term "food science" is indeed accurate, because science implies experimentation as well as failure. Yesterday I decided to make some macaroni and cheese, couldn't be simpler, right? Well, when you're using Molecular Gastronomy, every ingredient counts. I went to my favorite books, Modernist Cuisine, and found the recipe for mac and cheese. (Also found on their website here). I found a variation using sharp Cheddar and Swiss mixed for a tangier cheese sauce, and decided to go for it. As I looked over the recipe I saw Sodium Citrate listed as one of the ingredients. Hmmm. I don't have any of that. What does it even do? Naturally, the next step was to ask Google what purpose Sodium Citrate serves in cooking. Turns out, Sodium Citrate is the Sodium salt derived from Citric acid, and is a pH buffer, as well as an emulsifying agent for the cheese proteins. But I thought to myself, "Oh come on, it's just melting some cheese, how much could it matter?" And that thought became a very valuable lesson for me that I hope to share with you.

So I followed the recipe, put some milk in a pot, cut up the sharp Cheddar and the Swiss cheeses, and readied my hand blender, which is used to disperse the cheese quickly into the liquid. But I had a few problems from the start.
Cheddar, and Swiss, and Hand Blenders, Oh My!
1. I was using a pot that was too big, so the blade on my hand blender was too far above the liquid to be able to do anything.
2. I had the heat on too high for using milk, mostly due to my impatience with cheese melting.
3. I had no emulsifier whatsoever.

So, naturally, after about five minutes and very few pieces of cheese later, I had a mess of curdled milk, oily cheese, and lumps of lactate proteins sticking to the pan. Unfortunately, my disgust overruled my better judgement, so I do not have a picture of this wonderful mistake to share. I promptly dumped my slop into the drain and determined to start over.

I made a few changes. I started with a much smaller pan so that I could actually blend the cheese in. Second, I added some Soy Lecithin, because I figured that the wrong emulsifier was better than none at all. And third I started with a base of water rather than milk, so my impatience would not affect my dish. Of course, this did not fix all of the problems. As a matter of fact, I gained a plethora of new ones.

The hand blender was doing its job quite well, but spattering hot cheese all over the stovetop--and me. A few seconds later, after turning my back for but a moment, I had about six inches of cheese foam forming on top of my sauce. Did I forget to mention that Soy Lecithin is also a very powerful foaming agent? A quick stir fixed the problem, but it was still a bit of a surprise I was not expecting. Finally, I had added all of the cheese and it had incorporated nicely...but the "cheese sauce" had the consistency of water. And watery mac and cheese does not appeal to anyone. So what did I do? Exactly what any good Molecular Gastronomist would do, I just started adding Xanthan gum until it thickened! A few grams later, the sauce had thickened nicely and smelled great. Whew. I poured it over the elbow macaroni that I had cooked (without incident) and added some diced green chile just for flavor.

The purpose of this story is to show how cooking is an improvisational art. True cooking is not following a recipe and getting what you expect, it's deciding what you want to eat and making it happen. This is why understanding ingredients and how they interact, not only chemically, but how flavors fit together and add or detract to a dish. Molecular Gastronomy exemplifies this by showing how even when you do not have the exact right ingredient, you can still be successful if you understand what each piece is meant to do. And sometimes, we get what we want despite those mistakes. And can sometimes be more delicious for doing so!

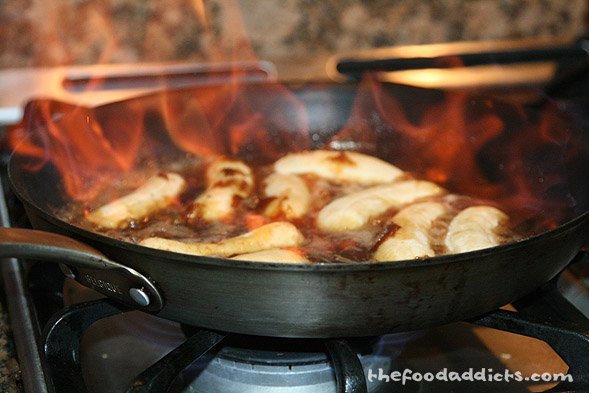
The more work you put in......the better it tastes!


Wednesday, February 6, 2013

The Importance of Stirring

Picture this. You're making dinner for your entire family. A fancy crown of pork, a huge bowl of mashed potatoes, and *insert your favorite dessert here*. Oh and a salad because serving a vegetable is mandatory. All of the ingredients for the dressing are put in a bowl: a drizzle of red wine vinegar, a smidgen of olive oil, some sugar, a dash of salt, done. You hastily whisk it all together until all of the ingredients combine...sort of. It is oil and vinegar after all, it's not like there is much you can do to combine them better. And while the salad is certainly tasty, you wish that you could have made your salad a little more special to match the rest of the meal. Some of the lettuce tastes vinegary, while other parts are oily. Is there no way to get a better mixture??? Aha! There is a better way! What you are looking for is called an emulsion.
Oil and Water DO mix....in an emulsion
An emulsion is when you combine two liquids that would otherwise separate due to density or polarity. They can be as simple as your whisked salad dressing, or as complicated as Mountain Dew (which is technically called a nano emulsion). Emulsions are all about how small the droplets of the two liquids are. A good emulsion means that the droplets are so small that they are indistinguishable by the human eye. Emulsifying involves two different parts: how you stir the liquids, and what you add too the liquids. Let's start with stirring.

There are lots of different ways to combine two liquids. You could just use a fork. Or a whisk, for a better emulsion. But think outside the box for a moment. How could we mix them further? How about a handheld milk foamer? (Which is basically just a tiny whisk that spins very quickly from a motor). Or beyond that, there is the handheld blender. These are the tools that are most available to the home cook. Past even those, scientists use machines called Rotor Stator Homogenizers, which create amazing emulsions. How we stir our liquids is half the battle, the other half is whether we use an emulsifier.

Emulsifiers, a kind of surfactant, are compounds that allow normally immiscible liquids to combine. They usually do this by binding to the outside of the droplets, making it harder for them to separate. One such ingredient is called Soy Lecithin. It is most commonly used as a dietary supplement derived from soybeans, but also has emulsifying properties. The convenient part for us chefs is that Soy
Lecithin is available at many health food suppliers or organic grocery stores.

I can see what you're thinking again. "I don't have a Rotor Stator Homogenizer! How can I create a better salad dressing from all this?" The answer is simple, and uses a device that most household kitchens contain. This might seem rather strange, but bear with me for a moment.

Put your salad dressing in the blender.

I'm serious! Think about what a blender does, it mixes all the liquids and solids at a high speed with a blade. That same principle behind making a milkshake can drastically improve your salad dressing. Still don't believe me? To prove my point, I did a little experiment involving oil and water to show you how much of a difference emulsions can make.


Now, watching that video would make you think that the whisk worked just as well as the hand blender. They all looked the same at the end. However, time shows which is truly the better emulsion. After I mixed all three solutions, I took pictures of the three cups every 15 minutes to watch their separation. Remember, the green is the whisk, the yellow is just the blender, and the blue has the emulsifier.


Notice how the green separates out immediately? The yellow separates into two layers, but clearly not as quickly or distinctly as the green. Meanwhile the blue only has a tiny strip of separation at the top. In fact, it took nearly 24 hours for the blue cup to separate into distinct layers. 

So, the moral of the story: put your salad dressing in the blender! Try it out! Leave a comment if you do and let us know how it worked for you!


Monday, February 4, 2013

And So It Begins

The ingredients have arrived! Which means that this week will end up being far more productive than I originally anticipated...so watch out for some pictures and experiments later this week!
Note the scales on the left. The top one goes to 0.01 grams of precision.
But back to the ingredients. In this post, I want to further explain what exactly I have and how I intend to use it. Similar to the last post, but on a much more specific level. So here we go!

The ingredients shown above can be grouped based on their uses into a few main categories (with a few exceptions): Spherification, Gelation (Gelification), and Thickeners.


Spherifiers:
Bacon Flavored Caviar Anyone?
All of the ingredients shown to the left are used in creating spheres out of liquids, which is one of the most common molecular gastronomy techniques. There are two specific types: regular spherification and reverse spherification. Regular spherification produces small caviar-like droplets of gel that tend to only be about the size of a pea. The Calcium Chloride on the bottom right and the Sodium Alginate on the top left are both used in this technique. Reverse spherification involves creating a much larger sphere, that is actually completely liquid on the inside. The Calcium Lactate on the top right is used with the aforementioned Sodium Alginate to produce this effect. More on the science behind this when I actually try to do it. The bottom left is Xanthan Gum, an extract derived from bacteria that is used to thicken a liquid to prepare it for both types of spherification; however, Xanthan Gum also has other uses.


Gelling Agents:
Never confuse a Gel for a Gelatin. Gelatin forms a Gel. A Gel...is a Gel.
As one might guess by the sheer number of those pictured here, gels are a large part of molecular gastronomy. Starting from the middle with the long thin sheets and going clockwise, here we have 160 Bloom Gelatin, Iota Carrageenan, Agar Agar, High Acyl Gellan, Low Acyl Gellan, and Kappa Carrageenan. All of these serve similar purposes: creating gels out of liquids. "Then why get six different ones???" Good question! While they all serve the same purpose, they all are meant for different situations and produce different properties in gels. Gels are described using a variety of specific words and generally are categorized by the following: elastic to brittle and tender to firm. Each of these gelling agents only will work for specific liquids based on factors like pH, temperature, molecular polarity, and more. Plus, if it's worth doing, it's worth overdoing.


                                                                                      Thickeners:
Through Thick and Thicker
Thickeners are something that most people can relate too a bit better. You use flour to thicken dough. Corn Starch to thicken soup. Lambda Carrageenan to thicken milk for cheese making. Okay, the last one might be a little out there. While traditional thickeners are very potent and useful, molecular gastronomists have to take the other chemical ingredients into account. Every ingredient must be chosen precisely and used in a precise amount to ensure good results. It should be noted that Lambda Carrageenan, unlike Iota and Kappa, does not form a gel and is used as a thickener for products high in Calcium. Xanthan Gum is also primarily a thickener when not used for spherification.


The Good, The Bad, and
The Tasty

The Rest:
the final ingredients I ordered are from three other categories that are a bit more complicated chemically. The large package in the middle is N-Zorbit M brand Tapioca Maltodextrin, and one of the things I was most excited about in this whole package. First of all, it contains the same amount of material as the two packages beside it; it's just so light that it takes up twice as much space. It is used for transforming fats and oils into solids. Mix a little N-Zorbit M into some melted butter or olive oil, and it turns into a powder. As soon as that powder hits your palette, it will turn back into a liquid. How awesome is that?!?! The orange package on the right contains Ascorbic acid, used as a pH buffer. (No cool visual effect, sorry). The ingredient on the right is the infamous Sodium Hexametaphosphate. Arguably one of the most fun and impressive compounds to say. Sodium Hexametaphosphate is what is known as a sequestering, or chelating, agent. When in a solution with metal ions, a sequestering agent surrounds the metal ion and makes it much less likely to react with other substances in the solution. Chelating agents are most well known for their uses in detoxification in cases of heavy metal poisoning. (Either way, don't drink the Mercury). In cooking, it can help prevent certain ions like Magnesium from reacting in a way that they aren't supposed to.

Whew. That is a lot of science. And not much food to show for it. Yet. Stay tuned, in the coming weeks you will see all of these ingredients and more being used to their full potential. In the mean time, please ask any questions you would like in the comments section, and share this page with everyone! Get ready for the good stuff, coming later this week!


Thursday, January 31, 2013

Sodium Hexametaphosphate and You

Perhaps the obvious first step in cooking is gathering the ingredients. While fine cuisine is most certainly about how a dish is put together, any true chef will tell you that a great meal begins with quality ingredients. Personal experience shows this to be true: would you rather have salad from a prepackaged bag or from vegetables from a farmers' market? A typical shopping trip would involve a drive to the grocery store and poking at the avocados and pears for fifteen minutes trying to decide which ones are riper. As Molecular Gastronomy is a modernization of past methods, there is only one place to go to buy the required ingredients. The Internet of course!
I can see what you are thinking. 'Did he just say the Internet? I am not buying my milk on craigslist!' Well, that is what you said in my mind anyways. The ingredients required for a connoisseur of Molecular cooking are slightly different than those found in an average kitchen. Names like Tapioca Maltodextrin and Low Acyl Gellan Gum tend to invoke images of chemicals rather than things you would want to eat. They also sound hard to find and use.
Even Molecular Gastronomists have to go shopping. But rather than going to a Fry's or Albertson's, many chefs go to Modernist Pantry. This website caters to (almost) all of your possible molecular needs. They have it all. Emulsifiers, pH Buffers, foaming agents, gelling agents, thickeners, even meat glue! Although I have yet to be brave enough to try the meat glue. Today I ordered a plethora of different ingredients from Modernist Pantry in anticipation of the official start of my project next week. There are a few things that I noticed that appeal to the home chef in this process.
1. Price
Most chemical ingredients used in Molecular Gastronomy are used in tiny increments. Often less than a quarter of a teaspoon for a whole meal, depending on the ingredient and dish. Even the most expensive components only run around $5-$15 for 50 grams. Although this may sound like very little, because such small quantities are used, the 50 grams can often last months depending on the frequency of use, and most ingredients have a near limitless shelf life.
2. Ease of understanding
All of the ingredients on Modernist Pantry are well labelled and almost always explained in the description. For the truly adventurous chef who is looking to try new and different techniques, this is invaluable. Agar Agar does not mean anything to the average chef without a science degree. But, luckily, they tell the buyer that it "Will form gels at 88 F and will not melt below 136 F." That makes a lot more sense for someone who is not used to the world of Molecular Gastronomy.
While I wait for my ingredients to arrive, I'm happy to answer any questions anyone has, just leave a comment and I'll get back to you as soon as I can! Stay tuned, next week the great experiments begin, and pictures will be plentiful!

Monday, January 21, 2013

When Is Food More Than Just Food...

...When it's art. And Science. Combined into a delicious concoction that is called Molecular Gastronomy. My name is Steven Howell, I am a senior at BASIS Scottsdale High School, and I love to cook; and, more importantly, to eat. And when I found out that my love of food could be linked to my love of chemistry and physics, I was instantly hooked. Molecular Gastronomy has recently arisen in the culinary industry as a new avante guarde way of cooking. It is taking cuisine that people have come to love and expect, and turned it on it's head, dipped it in liquid nitrogen, and served it on a platter in tiny frozen pieces. It is as unexpected as the previous sentence.
During the course of my project over the next few months, I will investigate whether these lofty culinary ideas like Sous Vide and Spherification are actually viable and useful to a home chef. Some people have heard of Molecular Gastronomy, but how many average cooks have taken it upon themselves to try it out? The answer is not enough. In only the past few months, Nathan Myhrvold, the genius behind the paradigm shattering set of books Modernist Cuisine, released a new volume entitled Modernist Cuisine at Home, a book that intends to try to change the current stereotypes of cooking in the home and bring it into the true modern era of cooking.
In the coming weeks, I will address three main concerns that have been perceived as prohibitive to home chefs and Molecular Gastronomy: financial feasibility (Roto Stator Homogenizer, that sounds expensive!), necessary understanding of scientific concepts (there's a difference between Calcium Chloride and Calcium Lactate?), and difficulty of culinary preparations (there is a fine line between a chiffonade and julienne). I will explore, experiment, and explain how all of these can be overcome, so stick around, put your napkin in your lap, and Bon Appétit!